
One of my favourite things to make in the whole world is pasta. Especially stuffed pasta. It is laborious and intricate, but because of that, it is so fulfilling to accomplish. Today’s post is featuring an Italian classic- Cappelletti. These beautiful, plump pastas are usually stuffed with a very simple meat based or cheese based filling, and are shaped into a “little hat” (as the name quite literally means). I have nothing against a simple cheese filling, but I always seem to want a little more to my filling than just cheese. Without straying too far from tradition, I have been experimenting with adding different roasted vegetables to my pasta fillings, other than butternut squash. This and spinach seem to be the two vegetables very commonly used in stuffed pastas, and frankly I am bored of it. There are so many vegetable possibilities, why are we often stuck with just two options? I have started my explorations with one of my favourite vegetables- roasted cauliflower.
Of course before we get into the filling, a good stuffed pasta needs to start with a great dough. Although pasta dough is very simple to make, using only two ingredients and two kitchen tools, there is still an art to doing it right.
To achieve a strong, smooth, and silky pasta dough, you need the proper ratio of flour to eggs. I have tried many different recipes and ratios… adding more egg yolks instead of whole eggs, or adding olive oil instead of extra egg yolks. None of these variations have beat just using the simplest of recipes; whole eggs and flour. Here is the ratio that works for me every time.
Note: The following recipe is by weight because it will yield a more accurate result. Eggs vary so much that it is important to weigh them or else you may have too little or too much liquid.
Pasta Dough
Yield: 4-6 servings
Ingredients:
- 450g all-purpose flour
- 250g large eggs
Conversion
- 3.5 cups plus 2 tbsp all-purpose flour
- 4.5 large eggs
Method:
Place the flour in a large mound on a clean work surface. Create a well at the center of the flour by moving your fingertips in a circular motion, pushing the flour away from the center and forming a circular wall. Make sure that the well you have created is large enough to accommodate all the eggs without spilling over the edge!
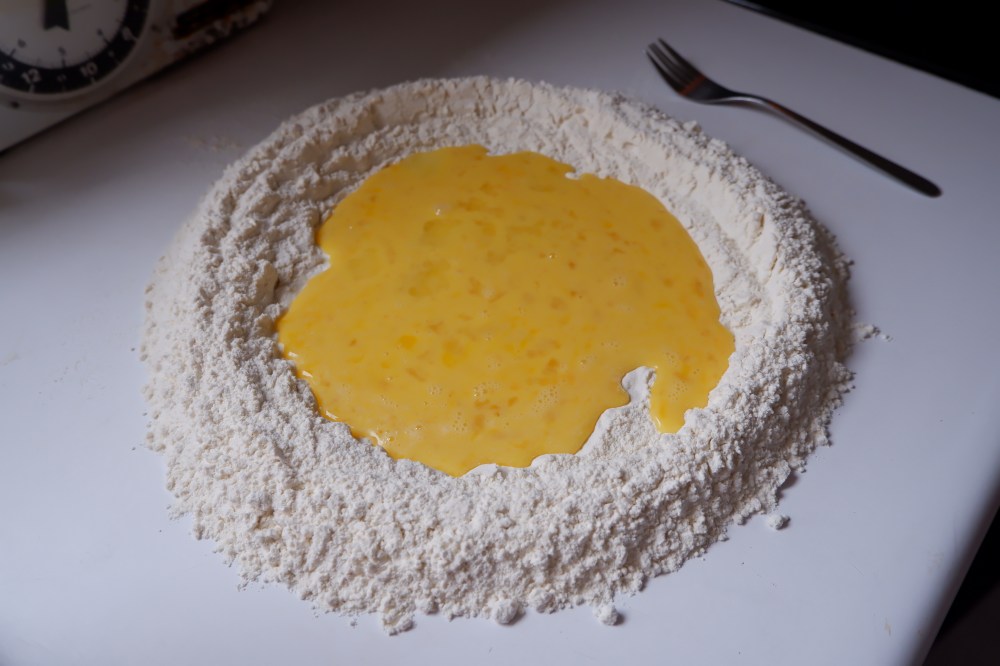
Add the eggs to the center of the well. Using a fork, carefully beat the eggs, slowly dragging flour from the edges and incorporating it into the egg. Continue this until the mixture is too thick to stir with the fork. At this point, I like to use a bench scraper to scrape the whole mixture around, cutting the remaining flour into the eggy paste.
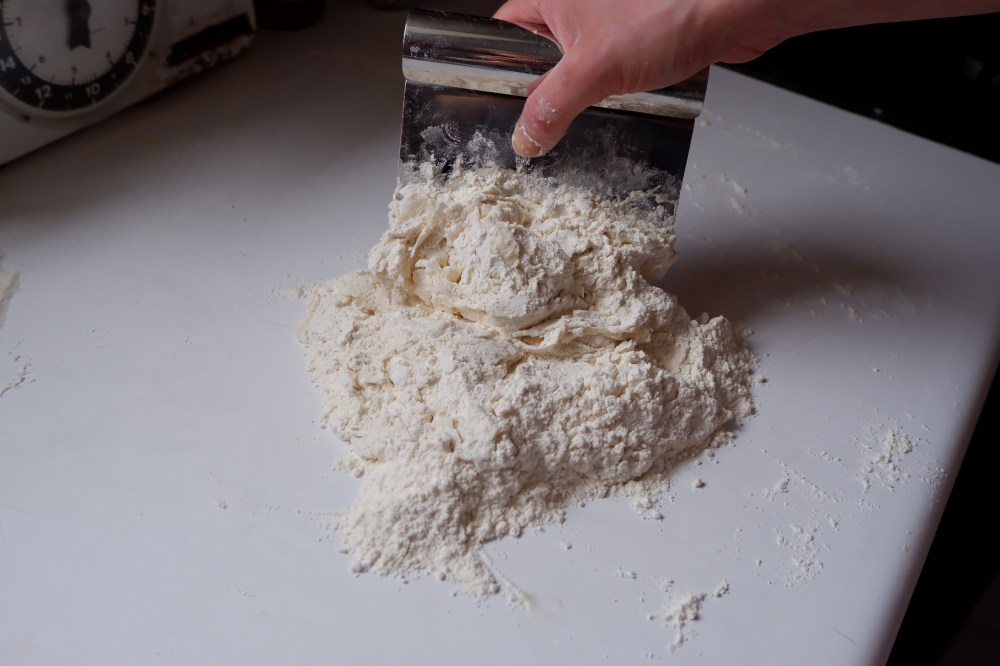
Moving forward, the only tool you will need is your hands. If there are any dry, chunky bits of flour left on the counter, scrape those aside and do not try to knead them into your dough. These will not incorporate well and will leave chunks in your end result. Knead the dough for approximately 7-10 minutes. At this point, the dough should be very smooth and uniform in colour and texture.
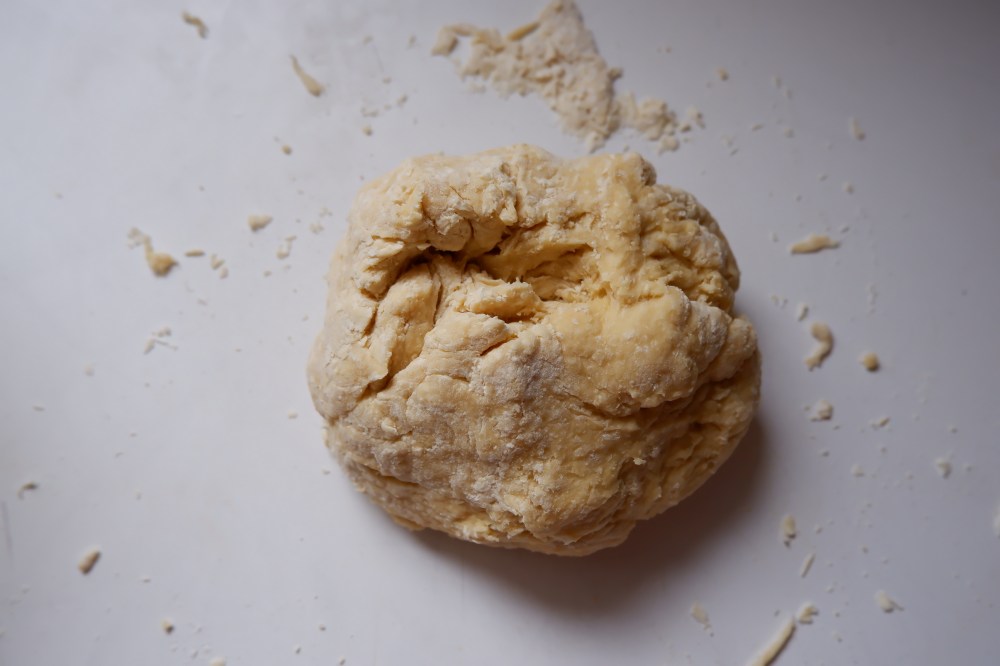
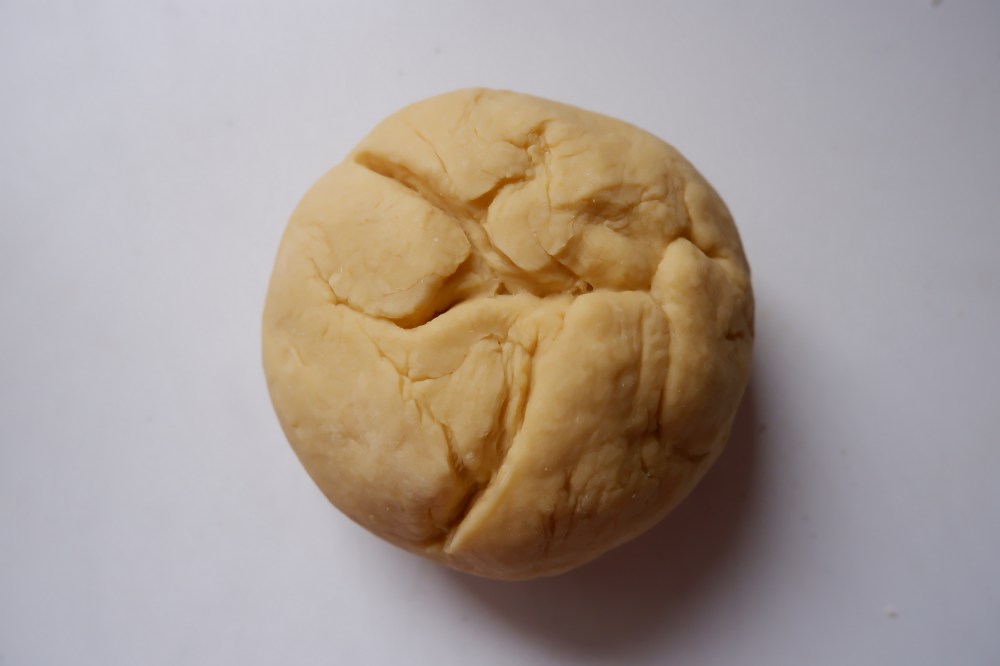

Wrap your final dough tightly in plastic wrap and let it rest on the counter for at least 30 minutes and up to 2 hours before rolling. You can place your dough in the fridge if you do not plan on using it right away, but it will need to be used within 24 hours.
Cauliflower Ricotta Filling
Yield: 375g/0.5L/4-6 servings
Ingredients:
- ½ head (415g) cauliflower, cut into florets
- 2 tbsp olive oil
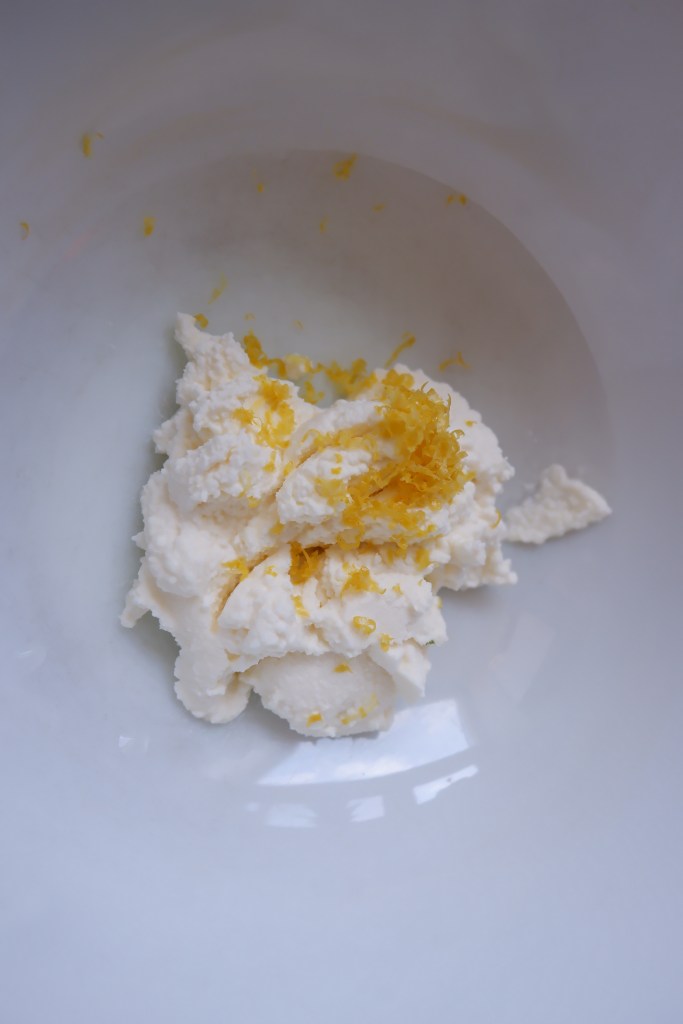
- ½ cup (125g) ricotta
- 1 tsp lemon zest
- Salt
- Pepper
Method:
Preheat the oven to 400 degrees F. Prepare a baking tray with parchment paper.
In a medium bowl, toss the cauliflower florets and olive oil. Add salt and pepper to taste.
Pour the cauliflower onto the prepared baking tray and spread the florets out evenly. Roast the cauliflower in the oven for 20-25 minutes, or until tender and golden on the edges. Remove from the oven and let cool.
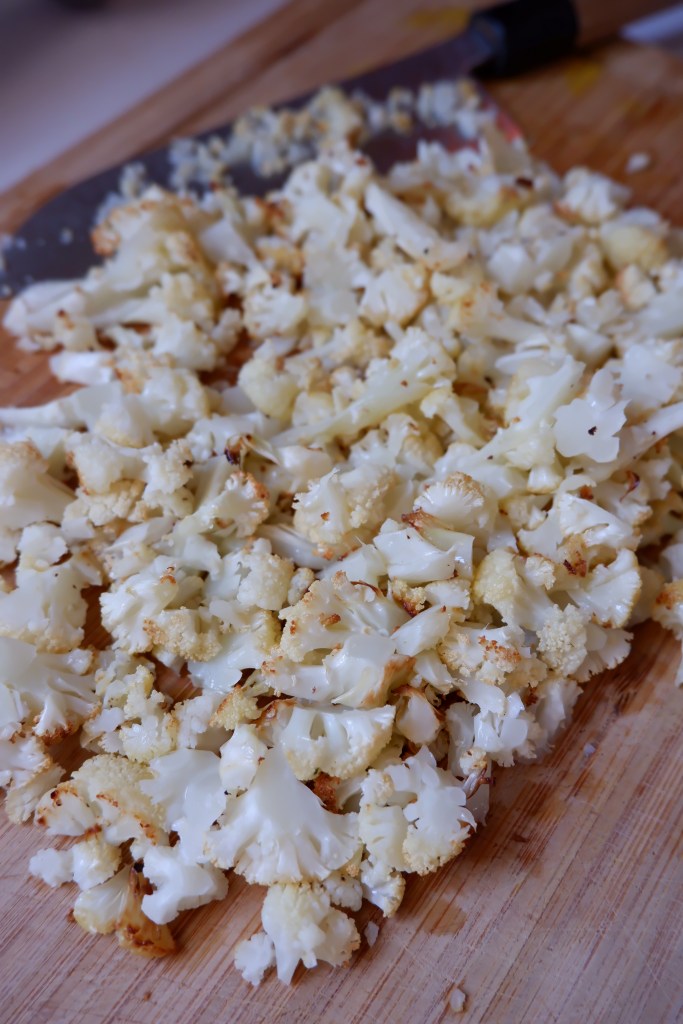
Using a food processor or blender, process the cooled cauliflower until a puree or paste forms. This will take about a minute. The goal here is to break down the cauliflower as much as possible so that it will mix smoothly with the ricotta.
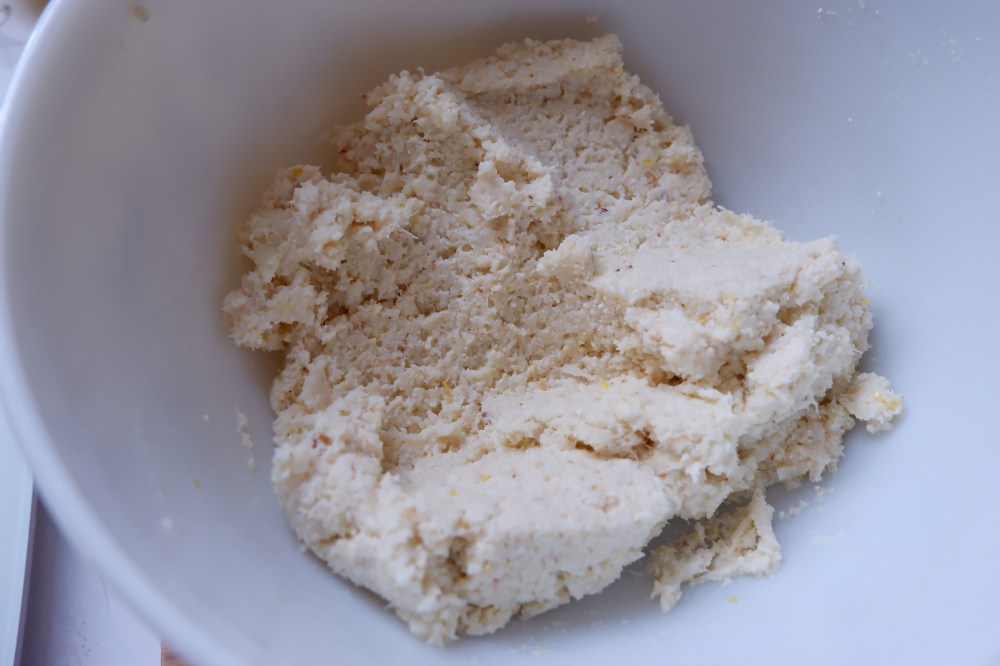
In a medium bowl, add the cauliflower puree, ricotta, lemon zest, and salt and pepper to taste. Mix until evenly combined. Set aside.
Final Pasta Assembly
You will need:
- 1 batch pasta dough
- 1 batch cauliflower ricotta filling
- Rolling pin
- Pasta rolling machine
- Circle cookie cutter (about 3 inches in diameter)
- Piping bag or small spoon
- Small bowl of water
- Flour
- Baking trays (lined with parchment paper)
Method:

Using a knife or bench scraper, divide your rested dough into six even pieces. Because we will be working with one piece at a time, keep the remaining dough covered in plastic wrap so that it does not dry out.
Starting with one blob of dough and a rolling pin, roll the dough to approximately ½ inch thick, or a thickness that will fit into the widest setting on your pasta rolling machine. If your dough is feeling wet or sticky, dust your rolling pin and pasta machine lightly with flour.
Note: A well rested dough should not need very much flour as it will have a softness but not a stickiness to it.
Roll the dough through the widest setting of the pasta machine. After the first roll, fold the dough into thirds, creating a small rectangle. Roll this folded rectangle through the widest setting again. Find the dial on your machine and turn it to one setting smaller. Roll your dough through this setting two times. Continue to decrease the width of your roller using the dial, rolling through each thickness setting twice. Do not roll to the thinnest setting on your machine as this will be too thin for stuffed pasta. Each machine has a different number of settings, but on my machine I roll to the second to last thickness, which is labelled “6”.
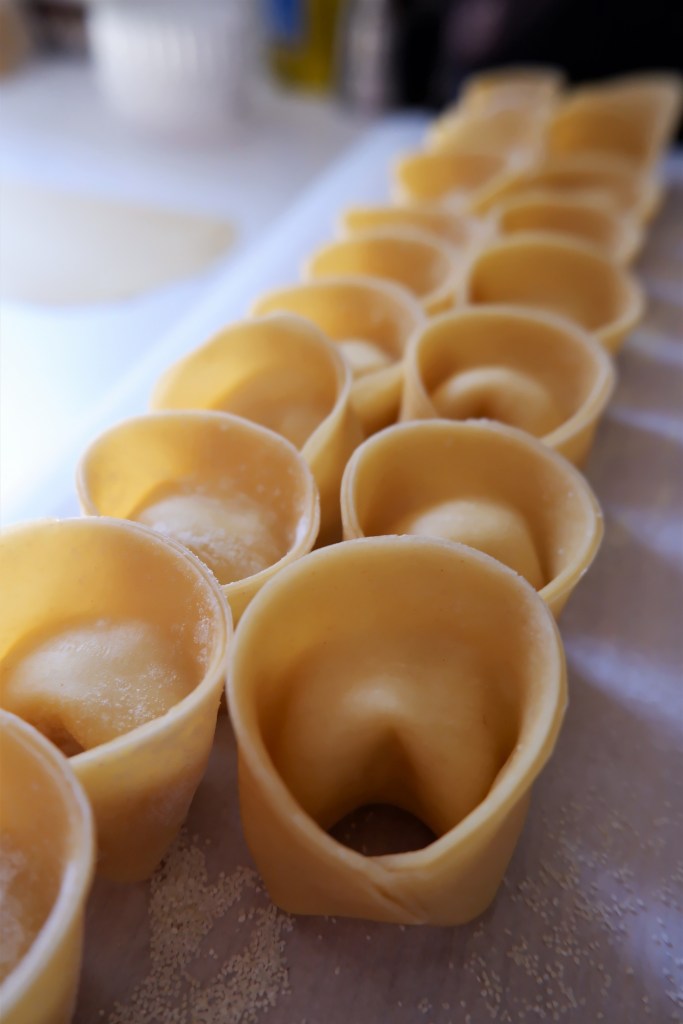
Lay your beautiful, thin pasta sheet out on a very lightly floured surface. Using a round cookie cutter (mine is 3 1/16 inches) cut as many rounds out of your pasta sheet as you can. Using a piping bag or a small spoon, place a teaspoon amount of filling at the center of each circle of dough.
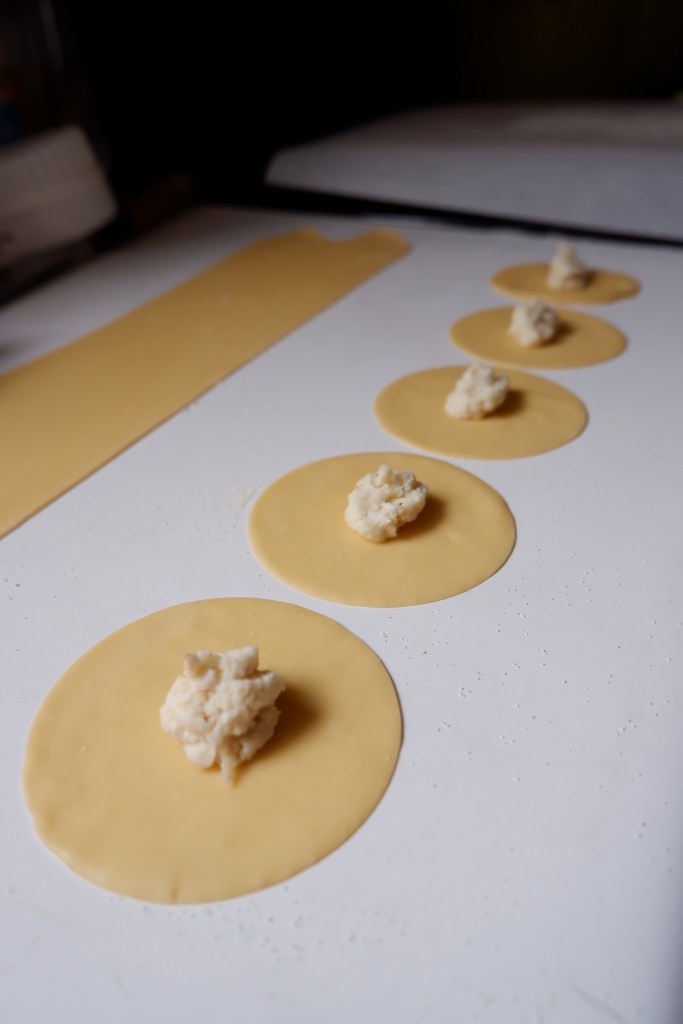
Using your finger, gently brush a small amount of water around the edge of half of the circle. Fold the circle in half over the filling, creating a half moon. Gently press the two layers of dough together starting closest to the filling and working your way out to the edges. This will help in removing any air bubble or pockets of air around the filling.
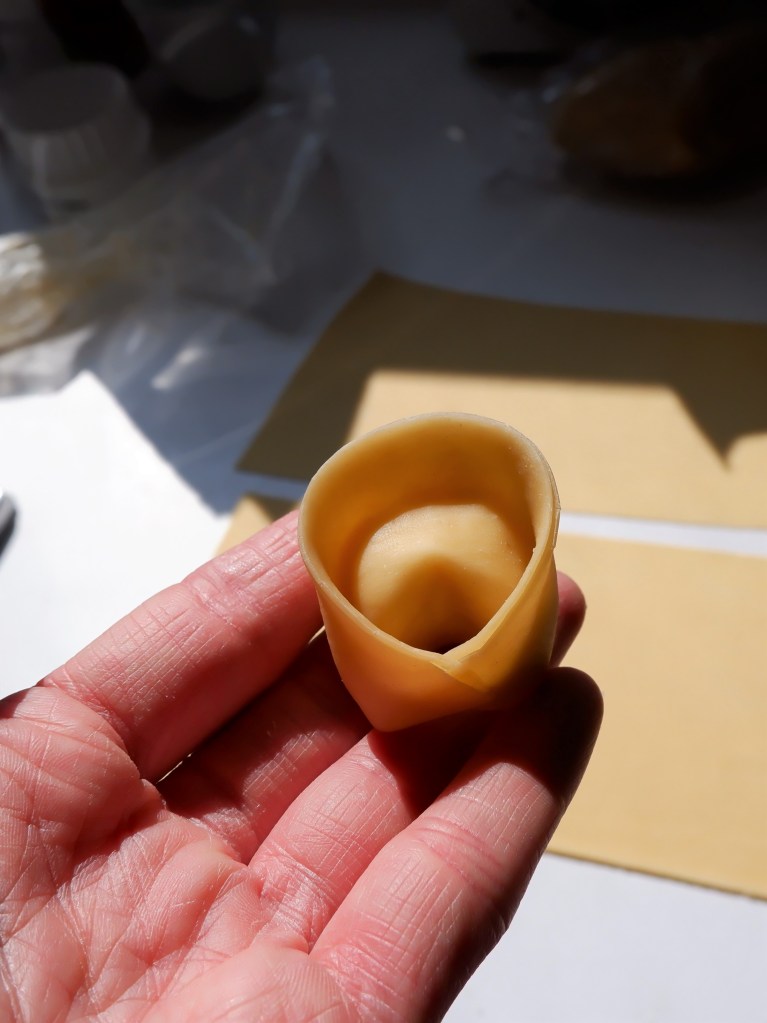
Pick up the sealed half moon, holding each corner or point between your thumbs and index fingers. Wrap one point towards the other, curving the half moon around one index finger. Overlap the two points and press together.
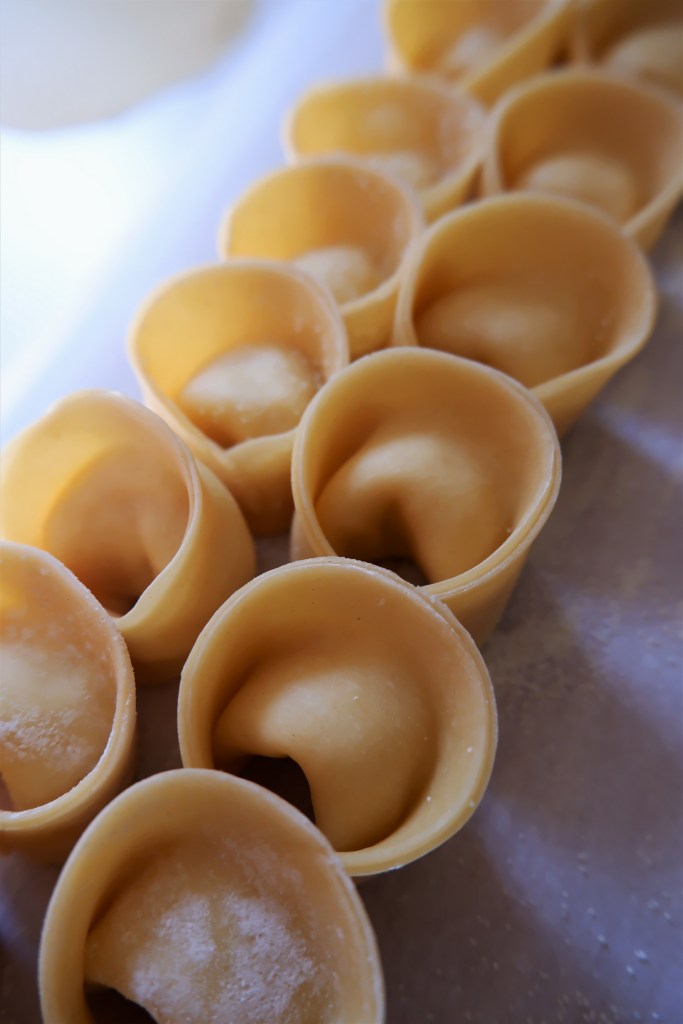
Place your finished pastas on a tray lined with parchment paper. I like to lightly dust the tray with semolina flour but regular flour will work as well.
Repeat all of the steps until you have used up the remaining dough and filling.
Once you are finished with rolling and filling, you can cook the pasta immediately or store for later use.
Cooking:
Bring a pot of salted water to a boil. Place one cappelletti in the water and set a timer for 2 minutes. This will be your “tester” pasta. After 2 minutes, remove the pasta from the water with a slotted spoon and taste for doneness. If it is not fully cooked, add 30 seconds more to your timer. Once you have determined the best cooking time, cook your pasta in batches to avoid overcrowding the pot. Cooking too many at once will lower the temperature of your water, as well as may cause your fresh pastas to stick together while cooking.
STORING:
Place your trays of fresh cappelletti in the freezer for about 45 min- 1 hour. Once the pastas are frozen, remove them from the trays and either store them in plastic bags or airtight containers. You can cook these straight from frozen using the same method outlined above.

Published by