
Making sourdough at home has been a goal of mine for quite a while. I never felt like I had the time or patience to do it myself, so I never did. There was also one time I did try growing a starter and killed it within a few days. Discouraging to say the least. With nothing but time on my hands, I don’t feel like I have any excuses left and need to jump on that sourdough bandwagon. Everyone in the city is making their own sourdough while in quarantine, and frankly I think that’s awesome.
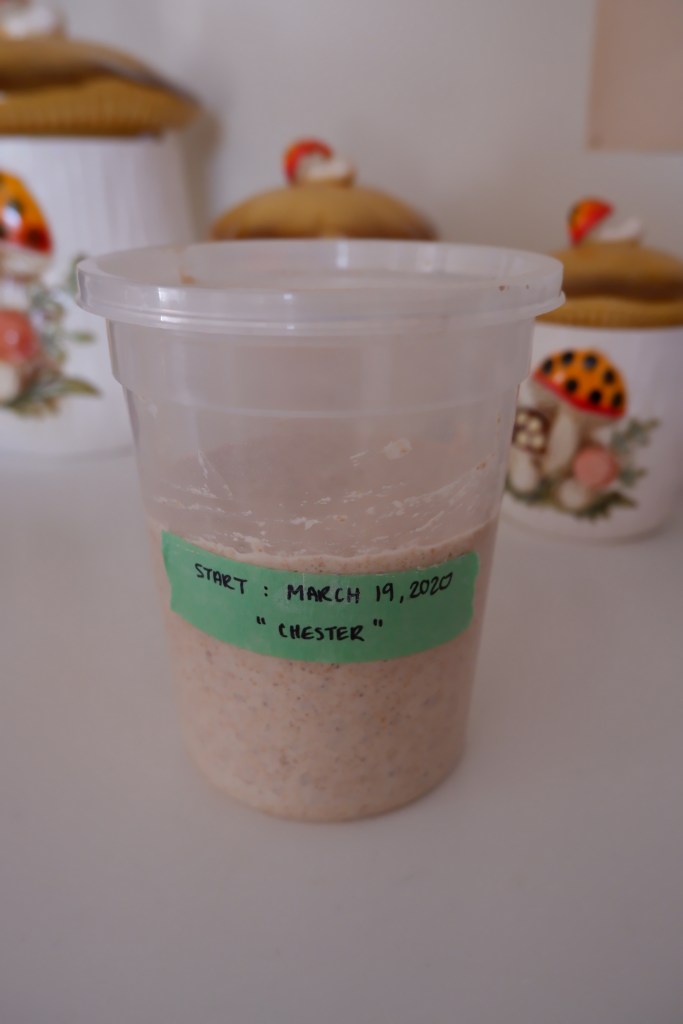
Sourdough is the oldest form of leavened bread and is a fundamental piece to the bread making puzzle. With such few ingredients, and such a long history under its belt, it seems surprising how few people do in fact make it themselves at home. With this thought at the back of my mind, I jumped right into developing a starter about 3 weeks ago. My starter Chester (yes I named him), was the easiest part of my sourdough journey so far. He has quickly become part of the family. When I wake up in the morning one of the first things I do is feed my cat Ms.P, and now, I feed Chester too. I must admit that I am not the perfect mom, I certainly had a couple of “OH MY GOSH I FORGOT TO FEED CHESTER” moments over the last few weeks. He was never starved to the point of no return however, so I don’t feel as bad.
If you are looking to make your own starter and begin your sourdough journey, I have outlined how I made and maintained my starter below.
Week 1: The Birth of Chester
To get my starter going, I carefully read and followed a post from the blog The Perfect Loaf:
7 Easy Steps to Making an Incredible Sourdough Starter- https://www.theperfectloaf.com/7-easy-steps-making-incredible-sourdough-starter-scratch/
Maurizio, creator and breadmaster, is seriously knowledgeable and detailed in his instructions here. I learned everything I needed to know in one clean and well organized post.
For Chester, I completed the following sequence of feedings (fermenting at room temperature):
Day 1- 100g rye flour, 150g water
Day 2,3- 75g starter, 50g rye flour, 50g ap flour, 125g water
Day 4,5,6- 75g starter, 50g rye flour, 50g ap flour, 125g water, x2 feedings 12 hours apart
Day 7 & Onward- 50g starter, 50g rye flour, 50g ap flour, 100g water, x2 feedings 12 hours apart
Note: If you are planning on making sourdough, I highly recommend purchasing a kitchen scale and a digital instant read thermometer. Bread is so delicate and temperamental that it is important to be measuring precisely and monitoring the temperature of not only the water you are adding to your starter during each feeding but the actual temperature of your starter and dough as it ferments.
Week 2: Chester’s First Bake
To tackle my first sourdough loaf, I used another recipe from The Perfect Loaf:
Beginner’s Sourdough Bread– https://www.theperfectloaf.com/beginners-sourdough-bread/
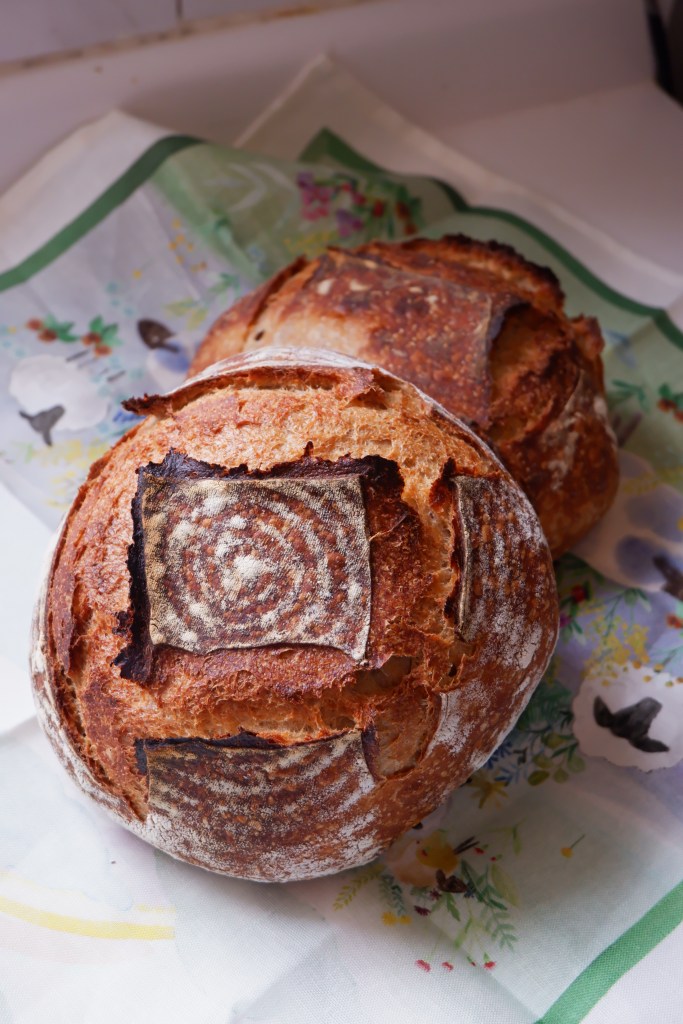
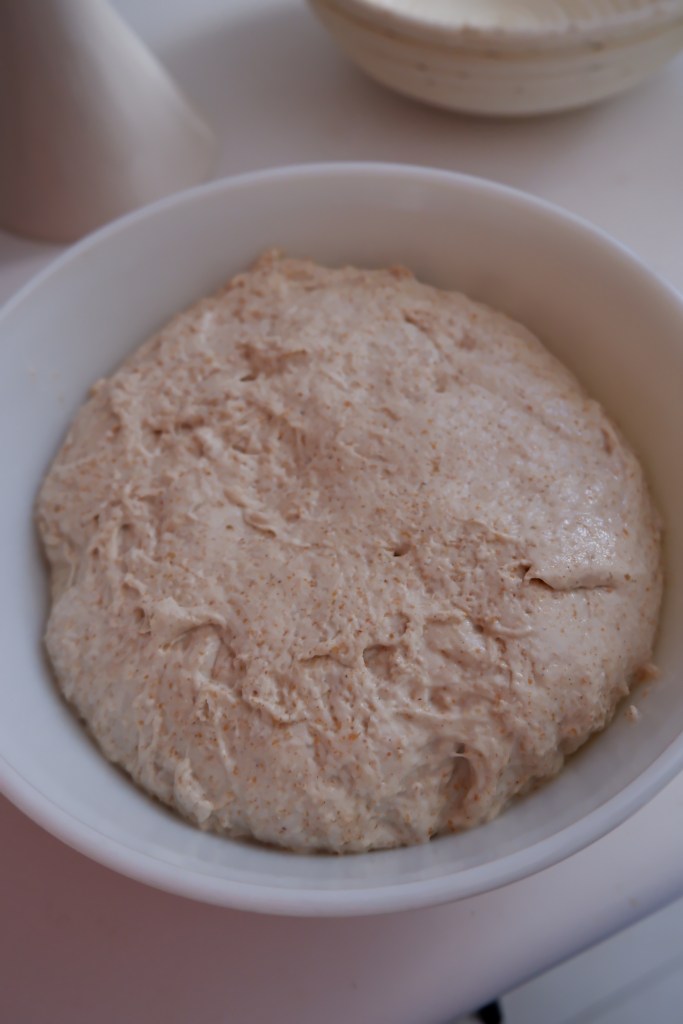
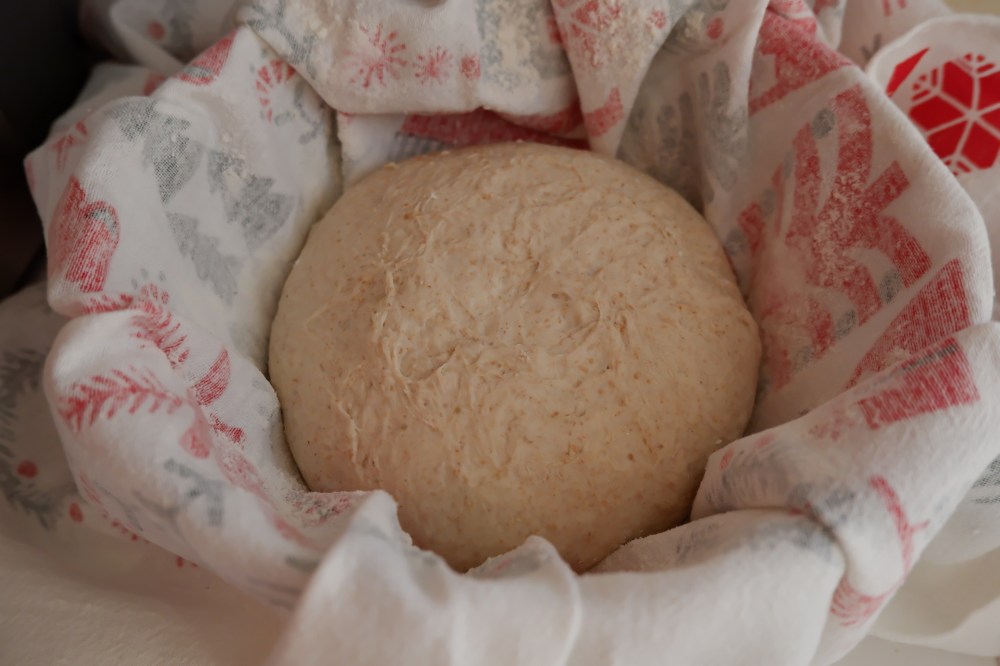
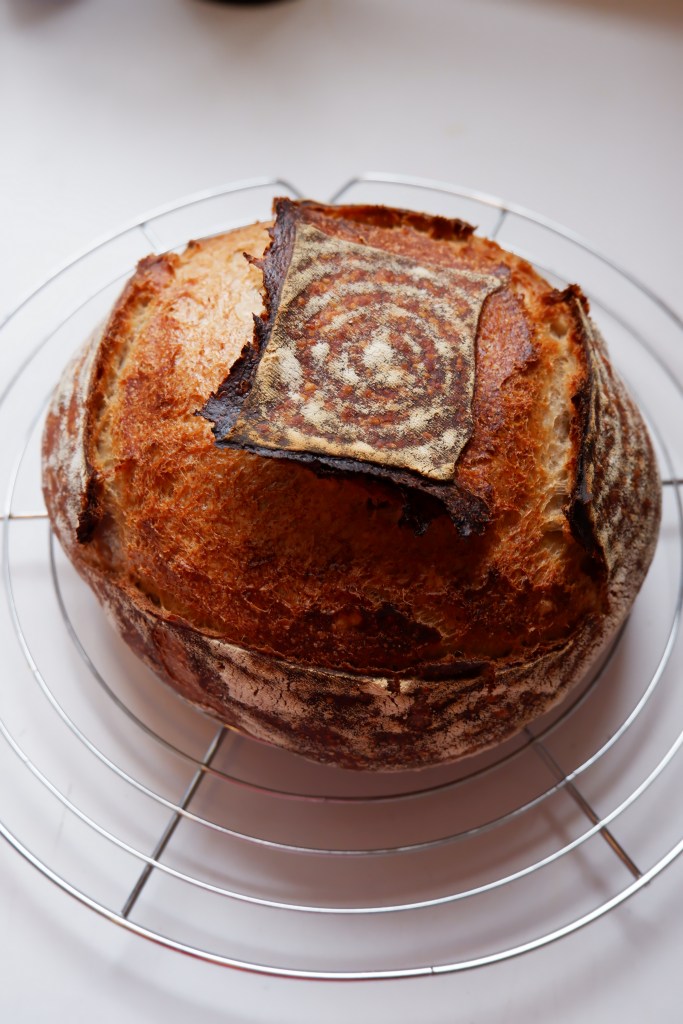
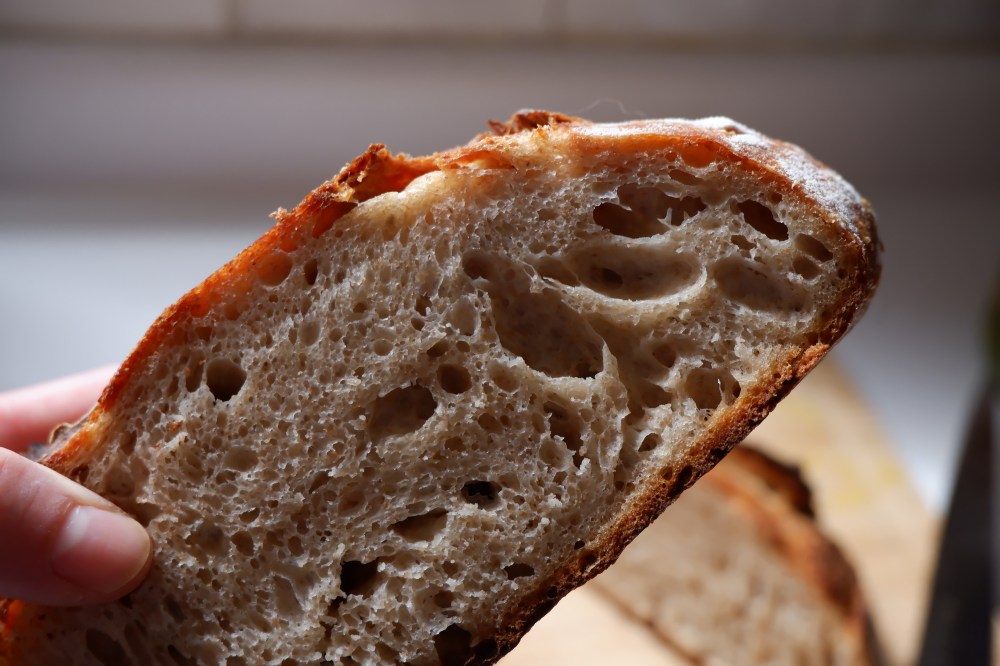
Again, I followed this very detailed recipe from start to finish. It is a long, multi-day process, but it is so worth it. Here is my photographic sourdough journey:
Week 3: Chester Goes on Vacation
At this point, I had baked 2 batches of bread and was feeding Chester 2 x per day. When you look at how much starter you discard during each feeding, it seems like a small amount at first but it most certainly adds up. To try and combat the guilt of food waste, I started adding this “discard” starter to other baked goods. One day I added some to banana bread, another day it made its way into some homemade pretzels. This was all great and tasted delicious, but there is only so much baking I can do in a week! I did some more research on starters, looking at how to make them more efficient. There isn’t just one answer to the efficiency question, but I feel like the best answer was this: If you are not baking more than 2 batches of bread per week, your starter should live in the fridge and not at room temperature on the counter. In the fridge, the starter’s fermentation and growth is slowed down because of the cold temperature. As a result, you only need to feed your starter 1 x per week. Now that’s an amount of discard I can work with.
Day 18– Chester moved to the fridge. He will now only require a feeding about 1 x per week. On feeding day, take the starter out of the fridge and let him rest on the counter until he reaches room temperature. Continue the feeding as follows: 50g starter, 50g rye flour, 50g ap flour, 100g water. Let this rest on the counter for a few hours before returning to the fridge.
A Few Last Words…
There is certainly an art to the bread making process and a deep well of knowledge to acquire. I have just started to dabble, but now i’m hooked. The first sourdough loaves I baked were absolutely amazing but my second batch was not great. I may have jumped a little too far ahead and attempted an advanced “Tartine” bakery loaf with walnuts. Oops. Don’t be discouraged when you have a few mishaps. We are all in this together. Bread making is something that you will only learn by doing, so get your hands in there! Pay attention to the details of how your starter and dough smells, looks, and acts. These observations will tell you everything you need to know. With a little bit of research and some patients, you will be a bread master in no time.
Good luck, and don’t funk it up 🙂

Published by