
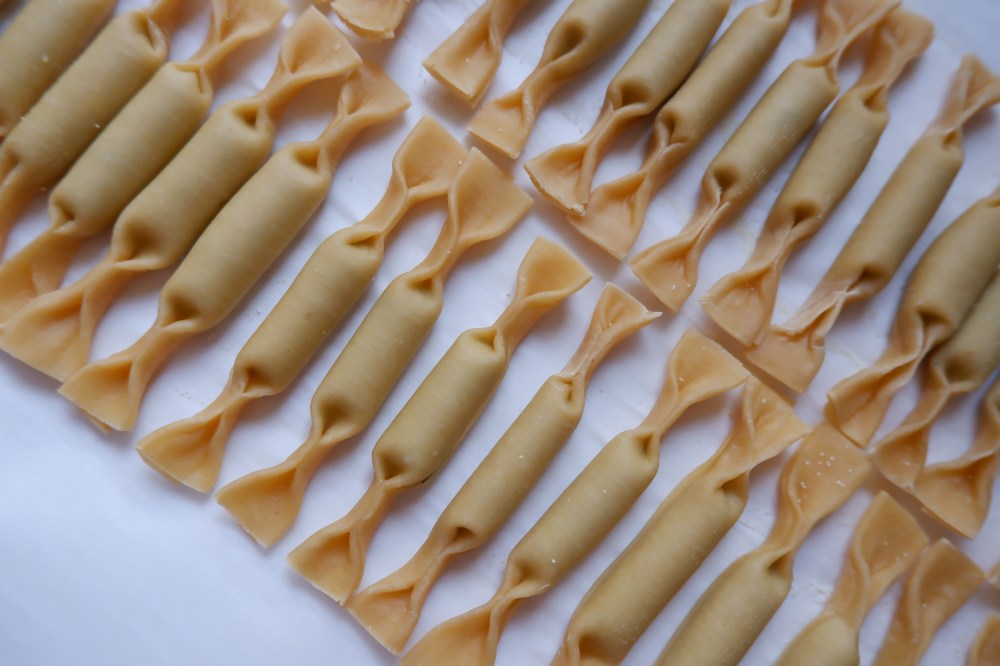
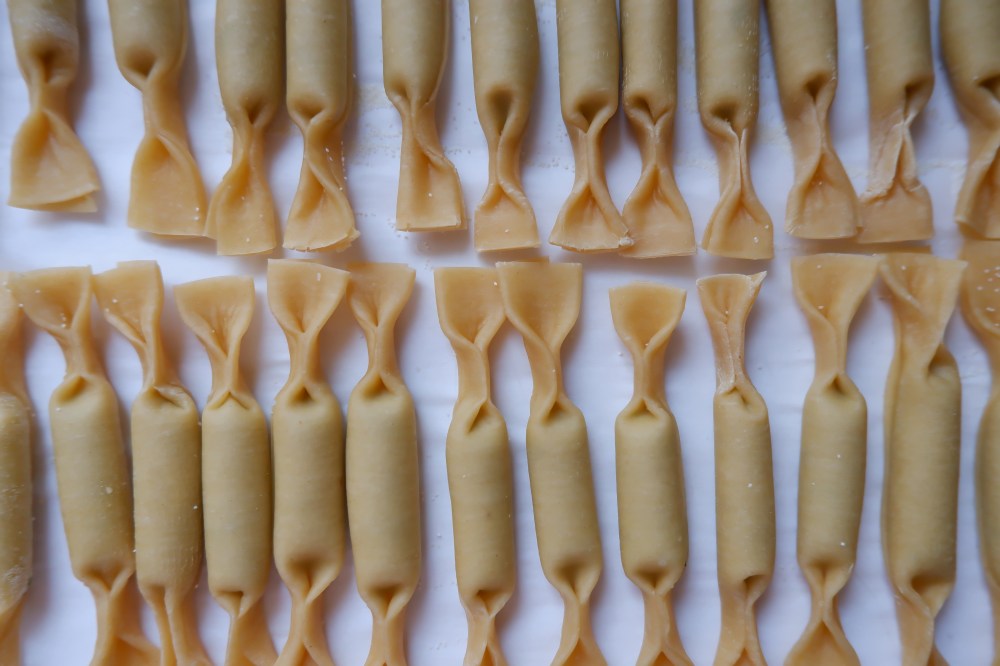
Caramelle, meaning ‘sweetie’ or bon-bon are a non-traditional pasta shape filled and twisted at the ends to resemble a wrapped candy. After doing a little bit of research, there doesn’t seem to be a strong history of this particular shape. It was likely introduced as a spin-off of other filled pastas and quickly became a novelty shape. Because of this, it is usually only served for special occasions but I figure every gosh darn day in quarantine is a special occasion!
This caramelle pasta filled with roasted eggplant and ricotta, is my first attempt at at both the shape and filling. The whole process felt quite easy and stress free. I would argue that the caramelle shape is one of the easiest of the filled pastas to execute. Not only are they adorable, but they have no waste. Often times I am discouraged to do a ravioli or tortellini that required a round cutter as you end up with so much dough in the garbage. Not with these babies!
Pasta Dough
1 x Pasta Dough Recipe (click here to see full ingredients and instructions from a previous posting)
Roasted Eggplant Filling
Yield: 350g/0.5L/4-6 servings
Ingredients:
- 430g eggplant (whole)
- 150g ricotta
- Handful of parsley
- Salt
- Pepper
Method:
Using a fork, pierce holes in the eggplant. Place the whole eggplant on the flame of a gas stove, rotating every few minutes. Continue roasting the eggplant until it is soft and the skin is burnt. Immediately transfer the whole eggplant to a heatproof bowl and cover with plastic wrap. Allow the eggplant to steam until it is cool enough to handle.
Note: If you do not have a gas stove, you can alternatively roast the eggplant whole in the oven at 400 degree F for 35-45 minutes.

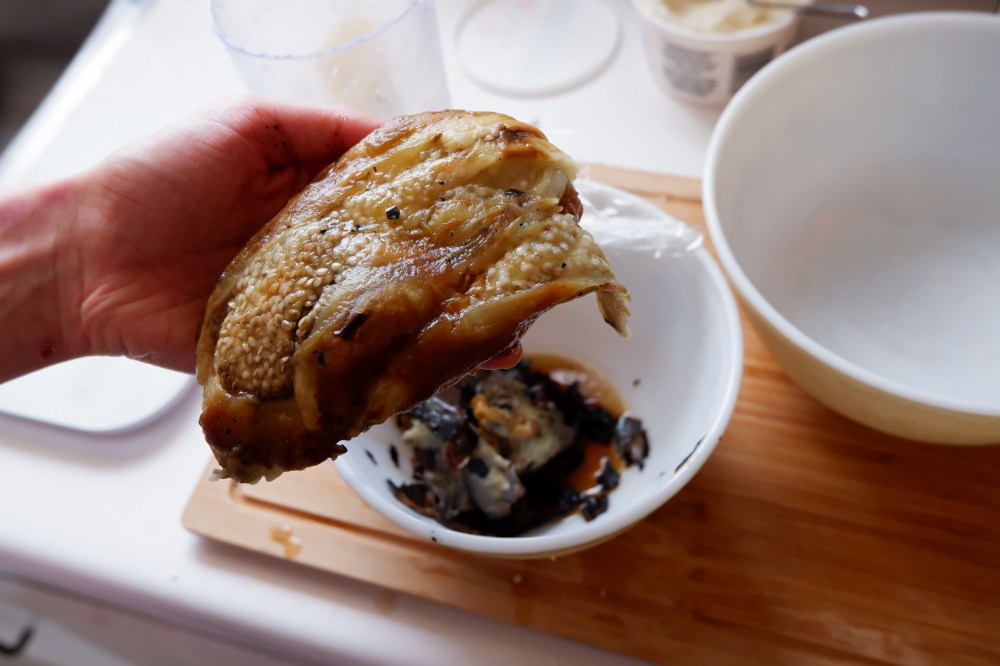
Once the eggplant can be handled, peel the skin off and place the flesh in a food processor or blender. Add the ricotta, parsley, salt and pepper (to taste). Process until smooth.
Final Pasta Assembly
You will need:
- 1 batch pasta dough
- 1 batch eggplant ricotta filling
- Rolling pin
- Pasta rolling machine
- Knife or pastry cutter
- Ruler
- Piping bag
- Small bowl of water
- Flour
- Baking trays (lined with parchment paper)
Method:
Using a knife or bench scraper, divide your rested dough into six even pieces. Because we will be working with one piece at a time, keep the remaining dough covered in plastic wrap so that it does not dry out.
Starting with one blob of dough and a rolling pin, roll the dough to approximately ½ inch thick, or a thickness that will fit into the widest setting on your pasta rolling machine. If your dough is feeling wet or sticky, dust your rolling pin and pasta machine lightly with flour.
Note: A well rested dough should not need very much flour as it will have a softness but not a stickiness to it.
Roll the dough through the widest setting of the pasta machine. After the first roll, fold the dough into thirds, creating a small rectangle. Roll this folded rectangle through the widest setting again. Find the dial on your machine and turn it to one setting smaller. Roll your dough through this setting two times. Continue to decrease the width of your roller using the dial, rolling through each thickness setting twice. Do not roll to the thinnest setting on your machine as this will be too thin for stuffed pasta. Each machine has a different number of settings, but on my machine I roll to the second to last thickness, which is labelled “6”.
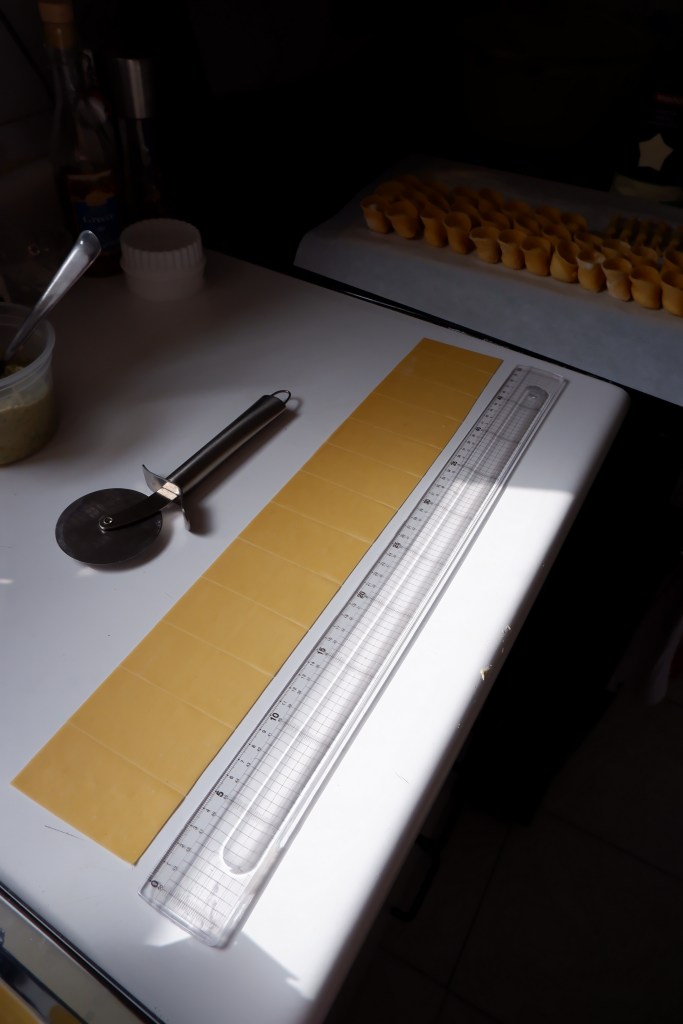
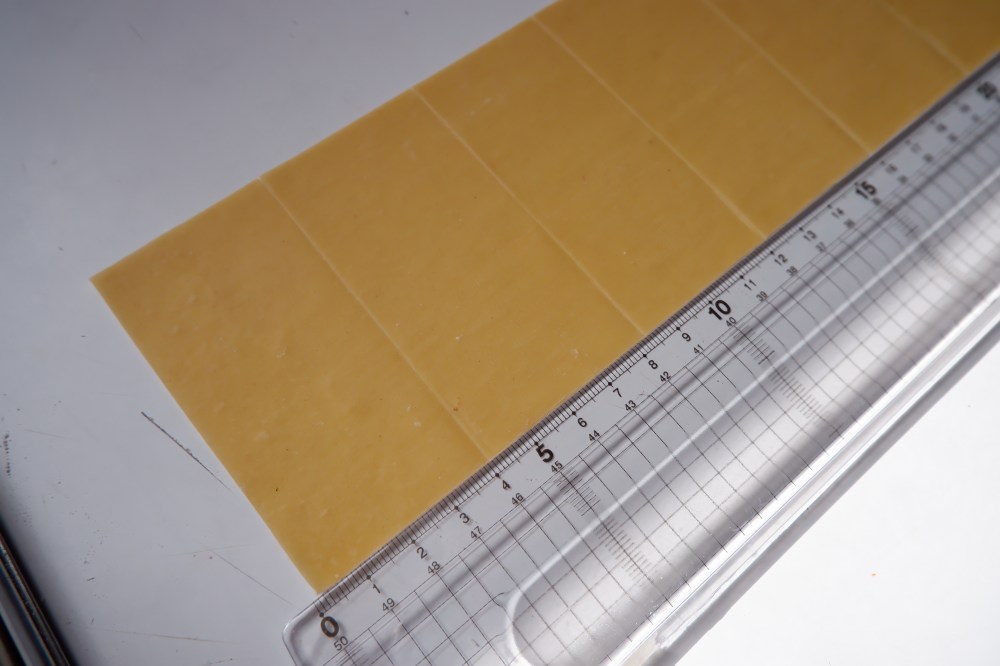
Lay your beautiful, thin pasta sheet out on a very lightly floured surface. Using the ruler, measure and mark the width of the pasta sheet to 8cm. Cut the top and bottom of the pasta sheet using the ruler as a straight surface. You should now have a nice 8cm wide rectangular sheet of dough. Next, mark 4cm pieces along the whole length of the sheet. Cut at each 4cm mark, creating 4cm x 8cm rectangular pieces.
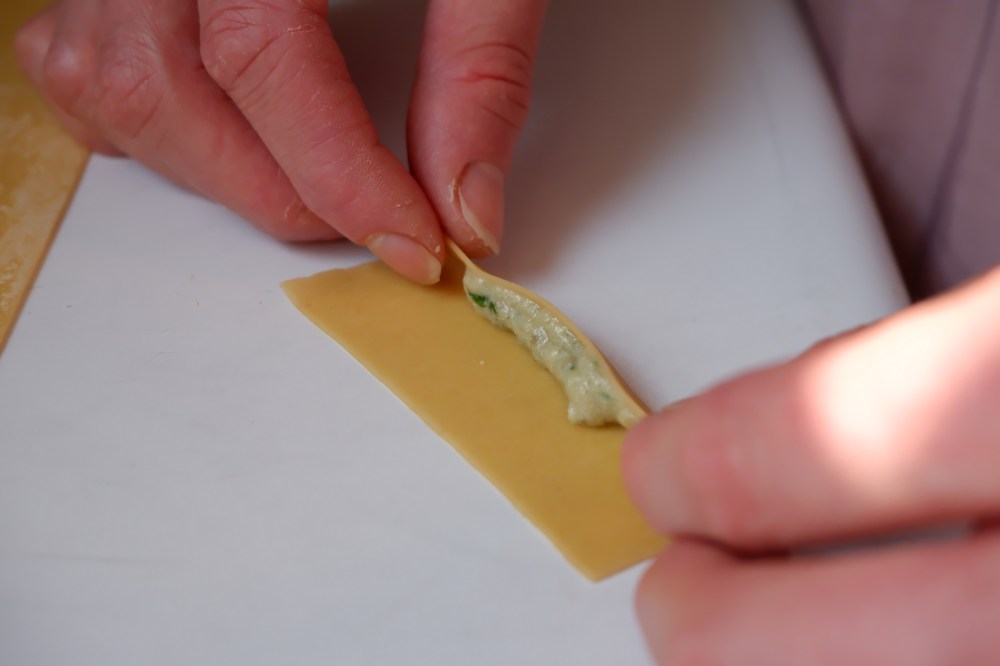
Place the filling in a piping bag fitted with a 1.5cm round tip. Alternatively, you can use a disposable piping bag or plastic bag and simply cut the tip. Pipe a small cylinder of filling along the long side of each rectangle, leaving about 2 cm on each end of filling (see the photo below for reference).
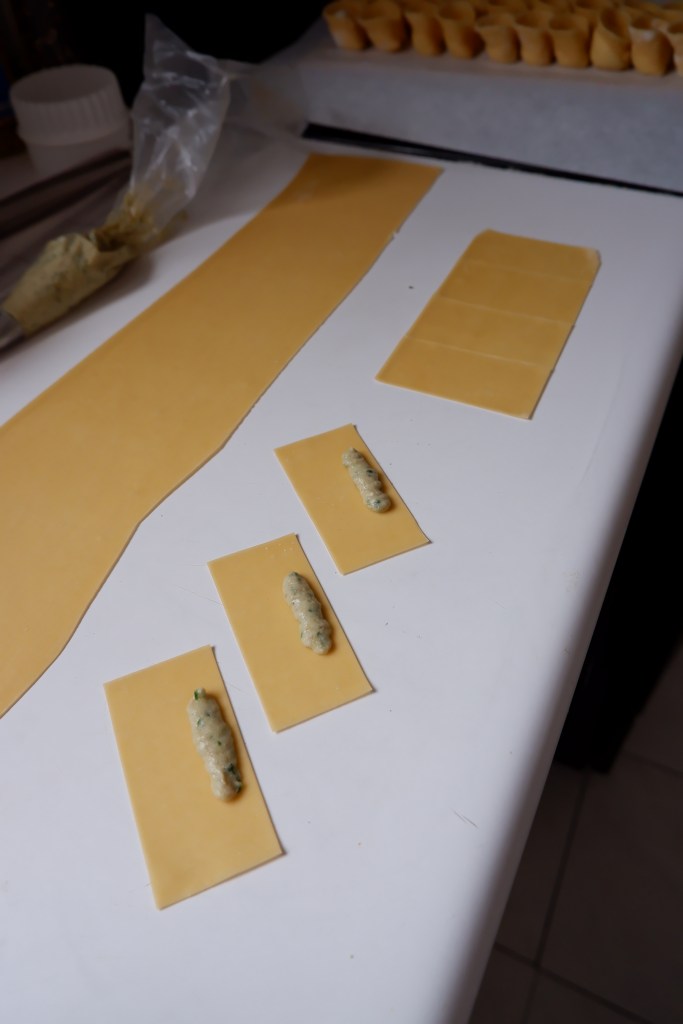
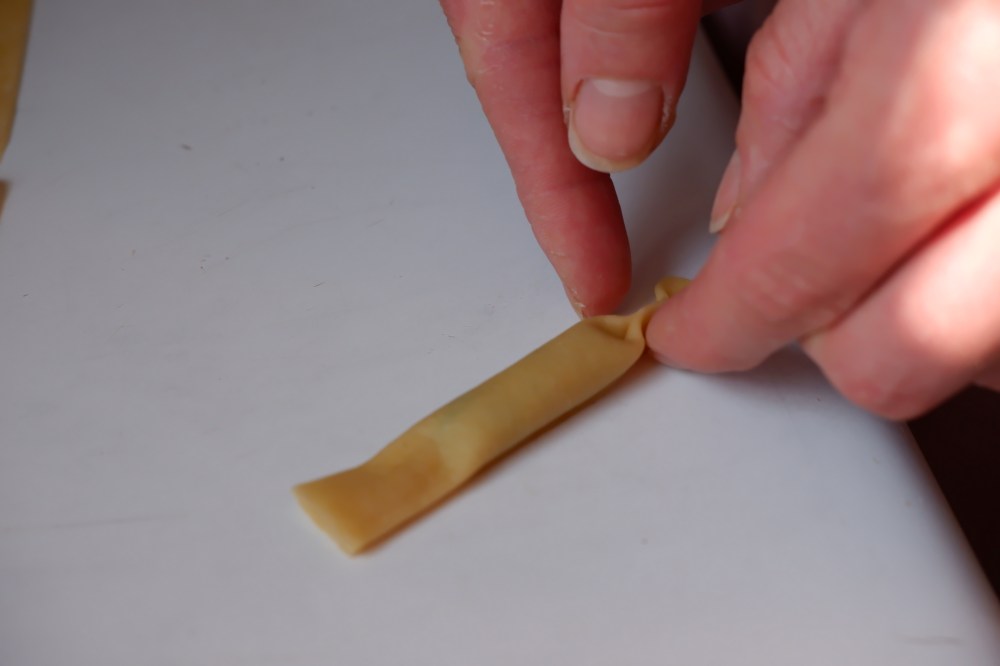
Roll the dough over the filling, forming a long cylinder. Seal the cylinder by brushing the edge of the dough with water and pressing closed. Pinch both ends of the cylinder sealing the filling at the center.


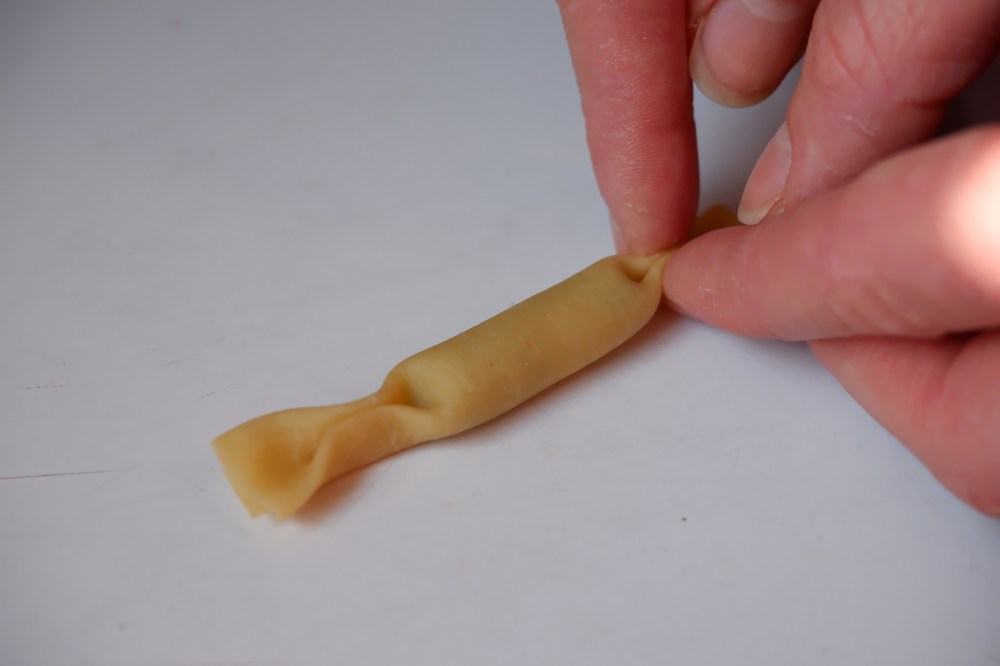
Place your finished pastas on a tray lined with parchment paper. I like to lightly dust the tray with semolina flour but regular flour will work as well.

Repeat all of the steps until you have used up the remaining dough and filling.
Once you are finished with rolling and filling, you can cook the pasta immediately or store for later use.
Cooking:
Bring a pot of salted water to a boil. Place one caramelle in the water and set a timer for 2 minutes. This will be your “tester” pasta. After 2 minutes, remove the pasta from the water with a slotted spoon and taste for doneness. If it is not fully cooked, add 30 seconds more to your timer. Once you have determined the best cooking time, cook your pasta in batches to avoid overcrowding the pot. Cooking too many at once will lower the temperature of your water, as well as may cause your fresh pastas to stick together while cooking.
Storing:
Place your trays of fresh caramelle in the freezer for about 45 min- 1 hour. Once the pastas are frozen, remove them from the trays and either store them in plastic bags or airtight containers. You can cook these straight from frozen using the same method outlined above.

Buon Appetito!

Published by